


Previous part: Multiple Glossaries
Using makeindex or xindy
So far I have only covered how to define a term, symbol or abbreviation and how to use it in the document, but it is likely that you will also want a sorted list of these entries. This is where things start to get a bit complicated and is often a source of confusion for beginners. If you are using glossaries-extra, the easiest way of creating a list of all your defined terms is to use \printunsrtglossaries. The “unsrt” part of the command name stems from the fact that the list is unsorted. For example:
\documentclass{article}

\usepackage{glossaries-extra}

\newglossaryentry{parrot}{name={parrot},
description={mainly tropical bird with bright plumage}
}

\newglossaryentry{zebra}{name={zebra},
description={wild African horse with black-and-white stripes}
}

\newglossaryentry{duck}{name={duck},
description={a waterbird with webbed feet}
}

\newglossaryentry{aardvark}{name={aardvark},
description={nocturnal African burrowing mammal}
}

\begin{document}
\printunsrtglossaries
\end{document}
This produces the following:
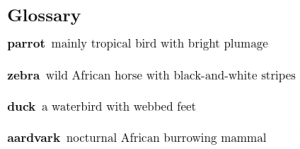
The list is in the order of definition: parrot, zebra, duck, aardvark. Here’s a minor modification to the document that adds an extra term (armadillo) and uses a different glossary style:
\documentclass{article}

\usepackage[style=indexgroup]{glossaries-extra}

\newglossaryentry{parrot}{name={parrot},
  description={mainly tropical bird with bright plumage}
}

\newglossaryentry{armadillo}{name={armadillo},
  description={nocturnal insectivore with large claws}
}

\newglossaryentry{zebra}{name={zebra},
  description={wild African horse with black-and-white stripes}
}

\newglossaryentry{duck}{name={duck},
  description={a waterbird with webbed feet}
}

\newglossaryentry{aardvark}{name={aardvark},
  description={nocturnal African burrowing mammal}
}

\begin{document}
\printunsrtglossaries
\end{document}
This again produces a list that follows the order of definition but it’s now using a style that shows letter group headings and there are now two “A” letter groups:
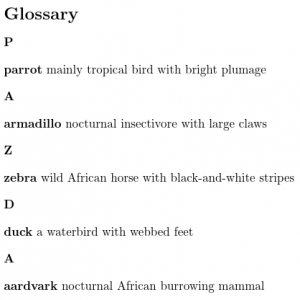
The list is now: (“P” letter group heading) parrot, (“A” letter group heading) armadillo, (“Z” letter group heading) zebra, (“D” letter group heading) duck, (another “A” letter group heading) aardvark. For the list to be in alphabetical order, it’s necessary for you to define the terms in the required order.
\printunsrtglossariesis the simplest way of producing a list but for large lists it’s tedious to ensure all entries are defined in the correct order.
The use of indexing applications, such as makeindex and xindy, remove this tedious work by automatically sorting the entries. Commands like \gls and \glssymbol index the entry, which provides the indexing application with the relevant information about which terms need to appear in the glossary, how they are sorted and what page or pages they were referenced on. This post describes makeindex and xindy, which can be used with both glossaries and glossaries-extra. There is an additional method of indexing only available with glossaries-extra that uses another application (bib2gls), which will be discussed in a later article.
In order to use makeindex or xindy, the first thing that you must do is add the command
\makeglossaries
to your preamble. (This needs to come after any occurrence of \newglossary.)
The next step is to put the command
\printglossaries
where you want your glossaries, lists of symbols or abbreviations to appear. This will typically be either in your front matter (with the table of contents, list of figures etc) or back matter (with the bibliography etc).
If you want to rearrange your glossaries or have some in the front matter and some in the back matter, you can use
\printglossary[options]
The optional argument can include the type key to indicate the glossary to display. The acronym package option (provided by glossaries) defines a shortcut command:
\printacronyms[options]
which sets the type to the acronym glossary, and the abbreviations package option (provided by glossaries-extra) defines a shortcut command
\printabbreviations[options]
which sets the type to the abbreviations glossary.
Further details about the available options are listed in the section Displaying a glossary in the glossaries manual.
For example (using glossaries):
\documentclass{article}
\usepackage{siunitx}
% Load hyperref before glossaries
\usepackage[colorlinks]{hyperref}
\usepackage[acronym,symbols]{glossaries}
\makeglossaries
% The following definitions will go in the main glossary
\newglossaryentry{culdesac}{name=cul-de-sac,
  description={passage or street closed at one end},plural=culs-de-sac}
\newglossaryentry{elite}{name={\'e}lite,
  description={select group or class},sort=elite}
\newglossaryentry{elitism}{name={\'e}litism,
  description={advocacy of dominance by an \gls{elite}},sort=elitism}
\newglossaryentry{attache}{name=attach\'e,
  description={person with special diplomatic responsibilities}}
% The following definitions will go in the list of acronyms
\newacronym{led}{LED}{light-emitting diode}
\newacronym{eeprom}{EEPROM}{electrically erasable programmable
  read-only memory}
% The following definitions will go in the list of symbols
\newglossaryentry{ohm}{type=symbols,name=ohm,
  symbol={\si{\ohm}},
  description=unit of electrical resistance}
\newglossaryentry{angstrom}{type=symbols,name={\aa}ngstr\"om,
  symbol={\si{\angstrom}},sort=angstrom,
  description={non-SI unit of length}}
\begin{document}
\tableofcontents
\section{Diplomatic Memoirs}
When I was an \gls{attache}, I lived in a \gls{culdesac}, but
I didn't much care for it as I found there was a fair amount
of \gls{elitism} amongst my neighbours.
\section{Student Memoirs}
When I was a student I often left bits of electronic circuitry
in my pockets, such as \glspl{led} and \glspl{eeprom}, which
often ended up in the washing machine. The \glspl{led} didn't
fair too badly, but the \glspl{eeprom} frequently broke.
\section{Symbols}
The \gls{angstrom} is commonly used in structural biology,
whereas the \gls{ohm} is used in electronics.
\printglossaries
\end{document}
This produces the document shown below on the first LaTeX run:
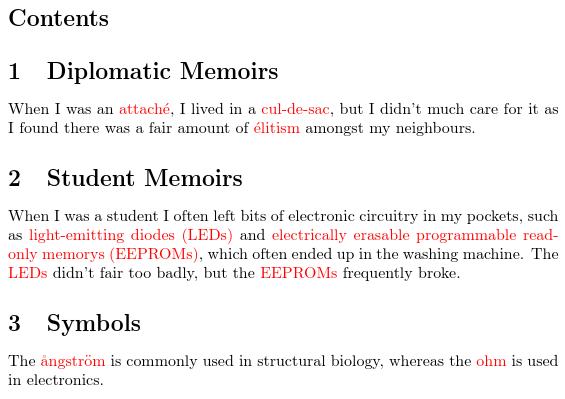
There are no glossaries here, and this often confuses new users as they’re expecting the glossaries at the place where \printglossaries occurs.
Now let’s look what happens if we change this example to use glossaries-extra instead:
\documentclass{article}

\usepackage{siunitx}

% Load hyperref before glossaries
\usepackage[colorlinks]{hyperref}
\usepackage[abbreviations,symbols]{glossaries-extra}

\makeglossaries

% The following definitions will go in the main glossary

\newglossaryentry{culdesac}{name=cul-de-sac,description={passage
or street closed at one end},plural=culs-de-sac}

\newglossaryentry{elite}{name={\'e}lite,description={select
group or class},sort=elite}

\newglossaryentry{elitism}{name={\'e}litism,description={advocacy
of dominance by an \gls{elite}},sort=elitism}

\newglossaryentry{attache}{name=attach\'e,
description={person with special diplomatic responsibilities}}

% The following definitions will go in the list of acronyms
\newabbreviation{led}{LED}{light-emitting diode}

\newabbreviation{eeprom}{EEPROM}{electrically erasable programmable
read-only memory}

% The following definitions will go in the list of symbols

\newglossaryentry{ohm}{type=symbols,name=ohm,
symbol={\si{\ohm}},
description=unit of electrical resistance}

\newglossaryentry{angstrom}{type=symbols,name={\aa}ngstr\"om,
symbol={\si{\angstrom}},sort=angstrom,
description={non-SI unit of length}}

\begin{document}
\tableofcontents

\section{Diplomatic Memoirs}

When I was an \gls{attache}, I lived in a \gls{culdesac}, but
I didn't much care for it as I found there was a fair amount
of \gls{elitism} amongst my neighbours.

\section{Student Memoirs}

When I was a student I often left bits of electronic circuitry
in my pockets, such as \glspl{led} and \glspl{eeprom}, which
often ended up in the washing machine. The \glspl{led} didn't
fair too badly, but the \glspl{eeprom} frequently broke.

\section{Symbols}

The \gls{angstrom} is commonly used in structural biology,
whereas the \gls{ohm} is used in electronics.

\printglossaries

\end{document}
The only difference is that I’ve replaced
\usepackage[acronyms,symbols]{glossaries}
with
\usepackage[abbreviations,symbols]{glossaries-extra}
and \newacronym with \newabbreviation.
This version produces a two page document on the first LaTeX run, but it doesn’t look quite how you might expect.
The first page is shown below:
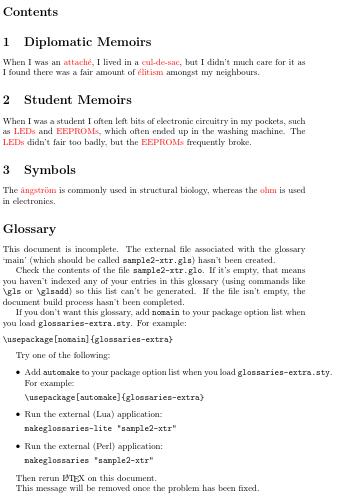
and the second page is as follows:
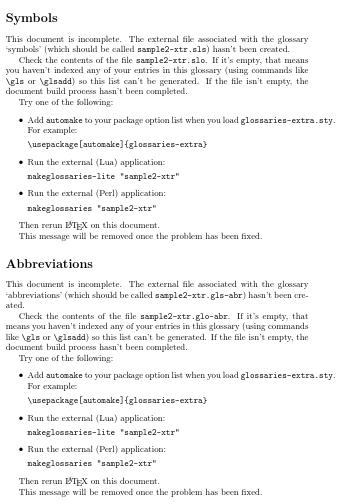
The first part of the document looks the same as the previous example, but information text has appeared at the point where my document contains \printglossaries. The text is as follows (the file was called sample2-xtr.tex):
Glossary
This document is incomplete. The external file associated with the glossary ‘main’ (which should be called sample2-xtr.gls) hasn’t been created. Check the contents of the file sample2-xtr.glo. If it’s empty, that means you haven’t indexed any of your entries in this glossary (using commands like \gls or \glsadd) so this list can’t be generated. If the file isn’t empty, the document build process hasn’t been completed.
If you don’t want this glossary, add nomain to your package option list when you load glossaries-extra.sty. For example:
\usepackage[nomain]{glossaries-extra}
Try one of the following:
- Add automake to your package option list when you load glossaries-extra.sty. For example:
\usepackage[automake]{glossaries-extra} - Run the external (Lua) application:
makeglossaries-lite "sample2-xtr" - Run the external (Perl) application:
makeglossaries "sample2-xtr"
Then rerun LaTeX on this document.
This message will be removed once the problem has been fixed.
The second page continues with similar text for the list of symbols and list of abbreviations. This text is an indicator that the document build process hasn’t been completed. (Just as ?? indicates a problem with a cross-reference and [?] indicates a problem with a citation.) Once the build process has been completed successfully, this text will be replaced with the appropriate glossary.
The problem is the same for both the glossaries and the glossaries-extra documents, but the glossaries-extra package tries to be helpful with some explanatory text about what has gone wrong (a necessary file is missing) and possible ways of fixing the problem.
The missing file (sample2-xtr.gls in this case) needs to be created by an indexing application. If you’ve used bibtex or biber, it’s a similar process. In this case, I need to use makeindex. If I add xindy to the package option list
\usepackage[acronyms,symbols,xindy]{glossaries}
or
\usepackage[abbreviations,symbols,xindy]{glossaries-extra}
then I need to run xindy instead of makeindex.
This can be a bit fiddly, as there are a number of command line switches that need to be set. Instead, you can use the makeglossaries Perl script. This reads the auxiliary file generated by LaTeX (sample2-xtr.aux in the above example) and works out whether to call makeindex or xindy and what settings to use. It also performs some diagnostics so that it can provide more informative messages if things go wrong. The “Using makeglossaries” section below, describes how to run this script.
If you don’t want to install Perl, there’s a light-weight Lua alternative called makeglossaries-lite (if it’s not installed, your version of glossaries may be too old). This is run in a similar manner to makeglossaries, so just follow the instructions below for using makeglossaries and replace “makeglossaries” with “makeglossaries-lite”. Note that the Lua script has a reduced set of options and doesn’t provide any diagnostics.
Be careful not to confuse
\makeglossaries(the command used in your LaTeX document) with makeglossaries (an external tool).
If you’re still stuck, you can use the automake package option:
\usepackage[automake]{glossaries}
or
\usepackage[automake]{glossaries-extra}
This will only work if you have the shell escape enabled. If the option isn’t recognised, your version of glossaries is too old.
The automake option will try to run makeindex or xindy using TeX’s shell escape (\write18) mechanism. Since this can be a security risk, this function may be disabled or it may be running in restricted mode which will only allow trusted applications to run. Check your log file to determine which mode is in use. For example, if the log file contains
restricted \write18 enabled
then the restricted mode is on. Since makeindex is a trusted application, the automake option should work in restricted mode.
If you’re still stuck, you can make TeX sort and collate the entries, but this is much slower (especially if there are a large number of entries). If you want to use this method, replace
\makeglossaries
with
\makenoidxglossaries
and replace
\printglossaries
with
\printnoidxglossaries
or replace
\printglossary
with
\printnoidxglossary
The pros and cons of using TeX vs makeindex vs xindy are discussed in the Introduction of the glossaries user manual.
Unless you use a command prompt or terminal, you will probably need to add a tool to your text editor to allow you to run makeglossaries (or makeindex etc). There is some advice for common editors below, but if you’re finding this a bit troublesome try out the automake option. (See also Incorporating makeglossaries or makeglossaries-lite or bib2gls into the document build.)
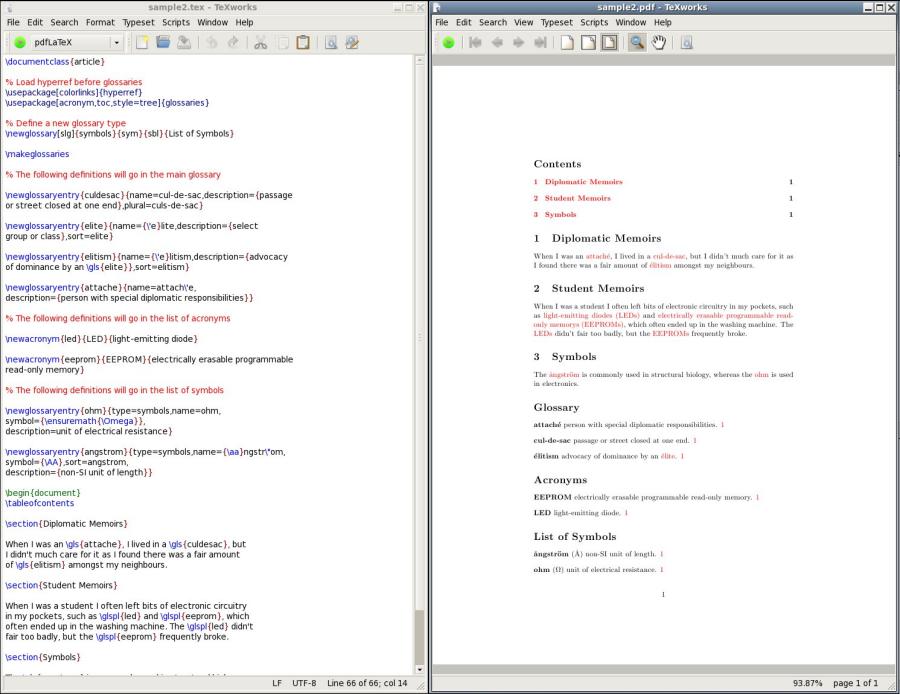
Here’s my example document showing in TeXworks:
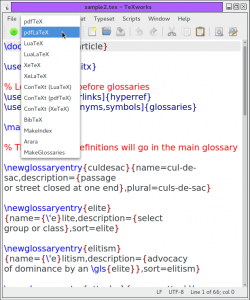
- I’ve used the dropdown menu to select PDFLaTeX. Then I clicked on the green “Typeset” button next to it. This creates a PDF file, but it’s missing the glossary.
- Next I used the dropdown menu to select the MakeGlossaries tool. I’ve already added this tool using the instructions below.
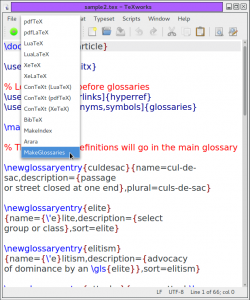
- Once this MakeGlossaries tool is selected, I need to click on the green “Typeset” button next to it. This doesn’t make any changes to the PDF. I need to select the PDFLaTeX tool again and once again click on the green “Typeset” button. The updated PDF now contains all the glossaries, but the log file has the warning:
pdfTeX warning (dest): name{glo:elite} has been referenced but does not exist, replaced by a fixed oneThis is because
\gls{elite}has only been used in the glossary (within the description ofelitism). The process needs to be repeated from step 2 above.
(If you’re also creating a bibliography and index, all these steps can be a nuisance, so you may want to consider using an automated system, such as arara or latexmk. See, for example, Building Your Document.)
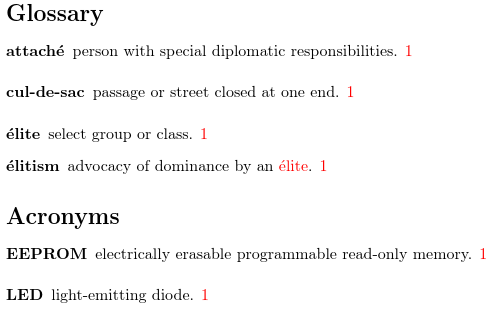
Once the document is complete, the main glossary and list of abbreviations at the end of the first page appear as follows:
and the list of symbols is on the second page:
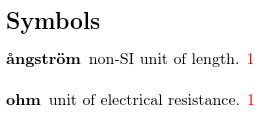
The default glossary style is to use a description environment with the entry names in the optional argument of \item (which is why they appear bold). The number following the description is the page number where the entry was referenced. (It’s displayed in red because it’s a hyperlink.)
The glossaries package provides over 100 different styles (most of them just minor variations on a theme). The style may be set using
\setglossarystyle{style-name}
(before \printglossaries) or through the style key in the optional argument of \printglossary. You can view samples of all the predefined styles at the glossaries styles gallery. The styles can be modified, but simple adjustments can be made with the glossaries-extra package through the use of categories.
For example, try out the above glossaries-extra example with the following added to the preamble:
\glssetcategoryattribute{general}{glossname}{firstuc}
or
\glssetcategoryattribute{abbreviation}{glossdesc}{firstuc}
Installing Perl
Perl usually comes with Unix-like operating systems, but if you are a Windows user you may need to install it. There are various options including Strawberry Perl and ActivePerl. I rarely use Windows, but Strawberry Perl seems popular and easy to install.
Remember that you don’t need to have Perl installed if you’re not using xindy or makeglossaries (or any other Perl scripts, such as epstopdf or latexmk).
Using makeglossaries
If you use a command prompt or terminal and your document is called myDoc.tex, then you need to do:
pdflatex myDoc
makeglossaries myDoc
pdflatex myDoc
(or latex or xelatex or lualatex as appropriate).
If you use arara, then you need to add the following comments to your document:
% arara: pdflatex
% arara: makeglossaries
% arara: pdflatex
If you are using MikTeX, the makeglossaries script will probably be located within the MikTeX scripts folder, for example C:\Program Files\MikTeX 2.7\scripts\glossaries. If you are using a Unix style system, it should be in the same location as makeindex (or there may be a symbolic link to the actual script from that location). If you prefer the Lua alternative with arara, then you need:
% arara: pdflatex
% arara: makeglossarieslite
% arara: pdflatex
(There’s no hyphen in the arara rule.)
Note that makeglossaries, makeindex and xindy are all command line applications, but most front-ends provide a way to run them from a menu item or button press. Here, I will demonstrate using TeXWorks, which is a cross-platform front-end. (At the end of this article, there is advice for TeXnicCenter and WinEdt users. If you use something else, you’ll have to consult your front-end’s manual to find out how to do it or search the relevant forum.)
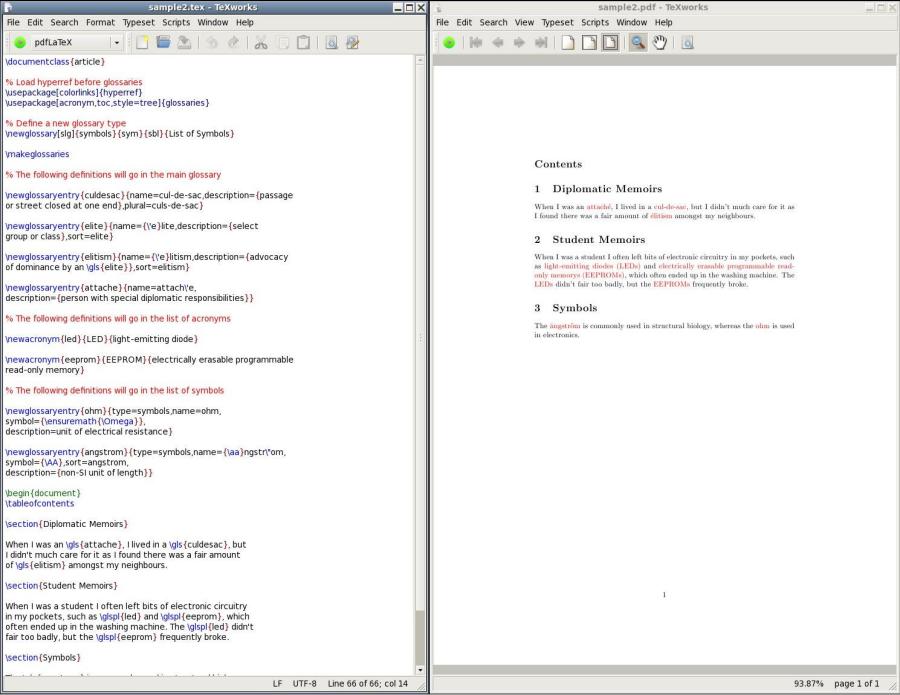
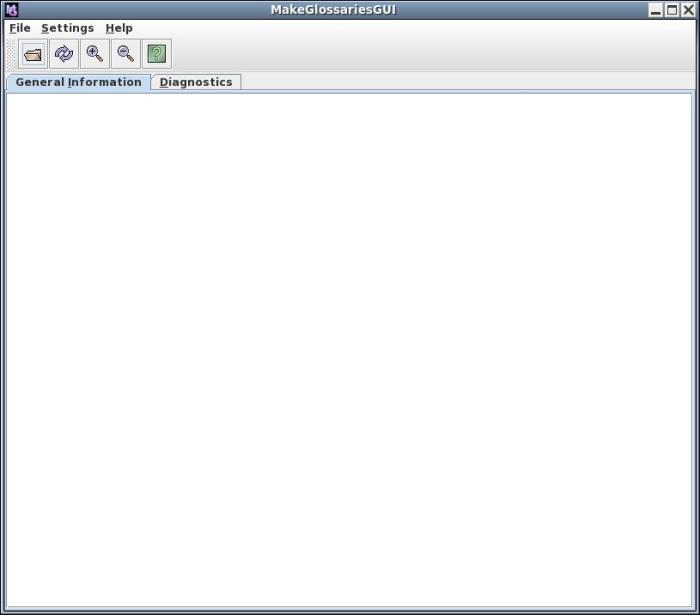
The image here shows the example listed above in TeXWorks. The first latex run doesn’t produce any glossaries (and the table of contents is also empty).
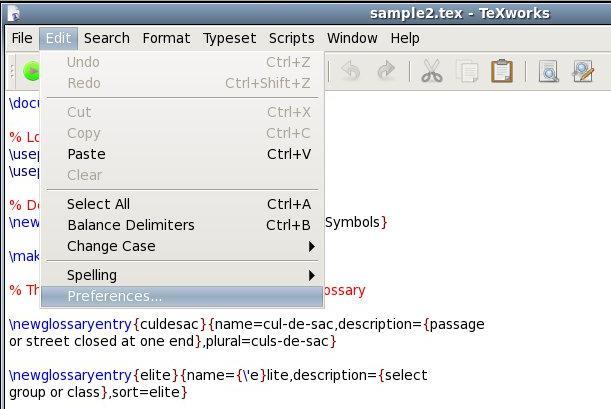
Next, you need to add makeglossaries to the list of applications that can be run in TeXWorks, so select Edit → Preferences…
This will open the Preferences dialog box. You need to make sure the Typesetting tab is selected:

Click on the lower plus (+) symbol next to the “Processing tools” list. This will display the “Tool Configuration” window:
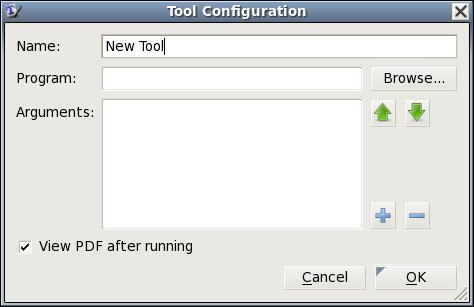
Enter the name of the tool (MakeGlossaries) and use the Browse button to select the makeglossaries script (makeglossaries.exe for Windows users):
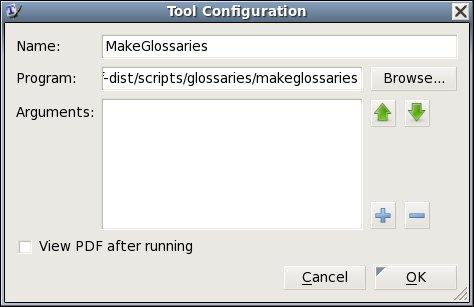
(You don’t need the “View PDF after running” box selected as running makeglossaries doesn’t modify the PDF file.) Next click on the plus (+) symbol and type $basename:
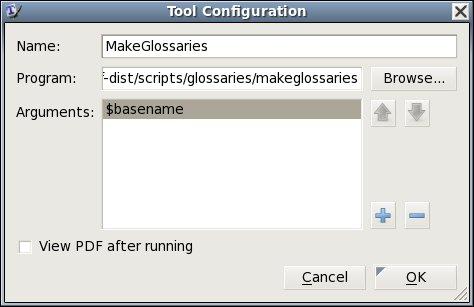
Click on “OK” and you should now see MakeGlossaries present in the drop-down tool list:
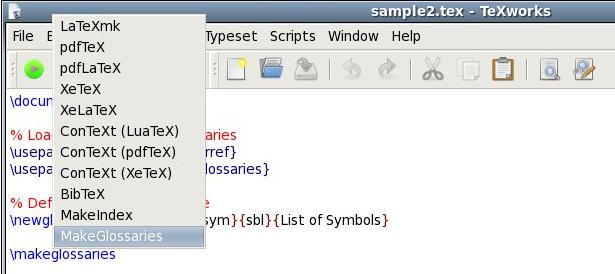
Select “MakeGlossaries” and click on the green run button. You won’t see anything different in the PDF yet. Use the drop-down box to select pdfLaTeX again and click on the green run button. Your document should now be updated and the glossaries should be present.
Note that the glossary (page 1), list of acronyms (page 1) and list of symbols (page 2) haven’t appeared in the table of contents. Another run (click the green button) is required.
The numbers after each glossary entry indicate the page number on which that entry was used. The numbers are red because the hyperref package has been used, and they link to the corresponding page. You can use the glossaries package option
nonumberlistto suppress the number list.
The list of symbols doesn’t show the corresponding symbol for each entry. This is because the default style ignores the symbol. Try changing the package options to:
\usepackage[acronym,toc,style=tree]{glossaries}
See the section “Glossary Styles” in the manual for a list of predefined styles.
In general, you need to perform at least three steps to ensure the glossaries are up-to-date:
- Run (pdf)latex
- Run makeglossaries (or MakeGlossariesGUI described below)
- Run (pdf)latex
Sometimes (as above) step 3 needs to be repeated. If your glossaries contain cross-references, you may need five steps:
- Run (pdf)latex
- Run makeglossaries (or MakeGlossariesGUI described below)
- Run (pdf)latex
- Run makeglossaries (or MakeGlossariesGUI described below)
- Run (pdf)latex
MakeGlossariesGUI
There is a Java alternative to makeglossaries called MakeGlossariesGUI. This doesn’t come with MikTeX or TeXLive, but can be downloaded from your nearest CTAN mirror. (Make sure you first have an up-to-date version of the Java Runtime Environment installed.) To install, you need to run the installer application makeglossariesgui-installer.jar. Depending on your operating system’s settings, you may be able to do this by simply double-clicking on the file icon after you have downloaded. Alternatively, you can run the installer from the command line:
java -jar makeglossariesgui-installer.jar
When you run MakeGlossariesGUI for the first time, you will be prompted for the paths to makeindex and xindy. (If you don’t want to use xindy, you can leave that box blank. Similarly, if you only intend to use xindy, you can leave the makeindex box blank.) After that you should see the following window:
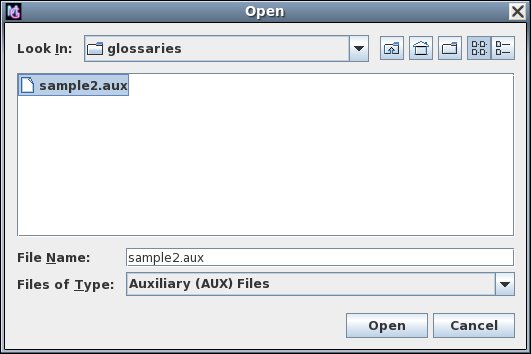
Use the open button or the File → Open menu item to load the auxiliary file created when you latexed your document. For example, my document was called “sample2.tex”, so I need to load “sample2.aux”:
Once you load the file, the application will automatically call makeindex or xindy for each defined glossary. The glossaries information will be displayed in the window:

If any problems occur, you can check the “Diagnostics” tab for help. For example, suppose I forgot to add \makeglossaries, then I’ll get an error message saying “Can’t determine indexer” and the diagnostics tab will display the message:
Your document doesn’t seem to have used \makeglossaries.
If you modify your document, run latex as usual and then reload the auxiliary file in MakeGlossariesGUI using the reload button or the File → Reload menu item.
Using makeindex explicitly
If you don’t have Perl (or Java and MakeGlossariesGUI) installed you can run makeindex explicitly. Let’s suppose that your document is called myDoc.tex. If you are using makeindex (that is, you haven’t used the xindy package option) then you need to use makeindex for each defined glossary. This includes the list of acronyms if you have used the acronym package option. The above example document has three glossaries: the main one, the list of acronyms and the list of symbols. The main glossary is created using:
makeindex -s myDoc.ist -t myDoc.glg -o myDoc.gls myDoc.glo
The list of acronyms is created with:
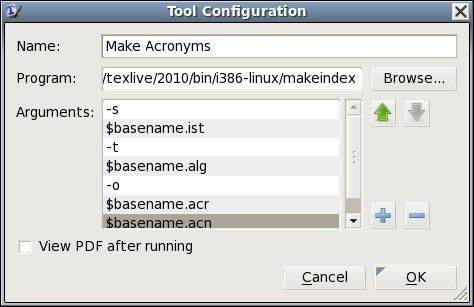
makeindex -s myDoc.ist -t myDoc.alg -o myDoc.acr myDoc.acn
The list of symbols is created with:
makeindex -s myDoc.ist -t myDoc.slg -o myDoc.sym myDoc.sbl
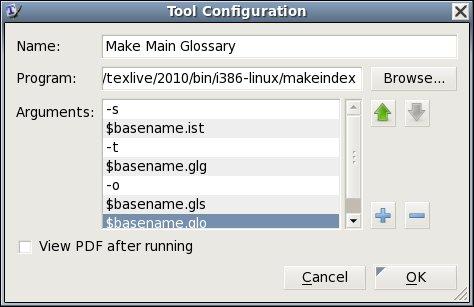
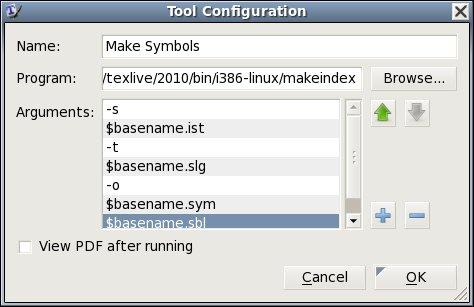
This means that you need to set up three separate tools in your editor. For TeXWorks, you need to go to the “Edit Preferences” window and create a new tool called, say “make main glossary”, select the path to makeindex and add the appropriate arguments:
Similarly for the list of acronyms:
and for the list of symbols:
Now, everytime you modify your document, you need to:
- Select the pdfLaTeX tool and click run button
- Switch to the Make Main Glossary tool and click run button
- Switch to the Make Acronyms tool and click run button
- Switch to the Make Symbols tool and click run button
- Switch to the pdfLaTeX tool and click run button
Depending on your document, you may need to return to step 2.
You may find it simpler to just use the automake option:
\usepackage[automake]{glossaries}
TeXnicCenter
You can add makeglossaries to the build profile of TeXnicCenter as follows:
-
- Install Perl (you will need to quit TeXnicCenter and restart it after installing Perl)
- Select the menu item Build → Output Profiles…
- Select the desired output profile from the box on the left (e.g. LaTeX=>PDF)
- Select the “Postprocessor” tab from the box on the right
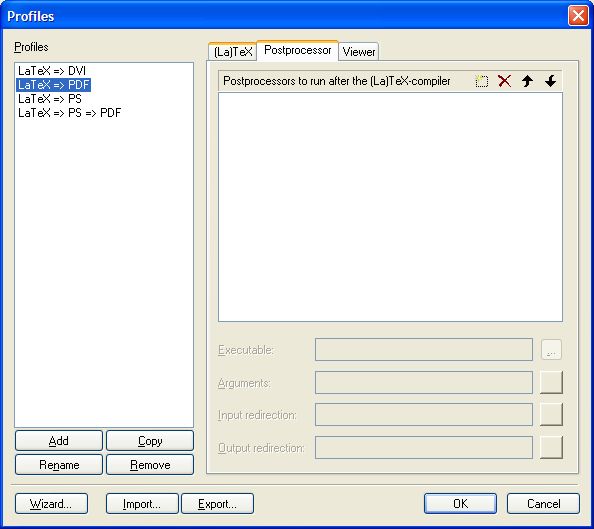
- Click on the “New (insert)” icon. (This looks like a dashed rectangle to the left of the red cross.)
- Type in
makeglossaries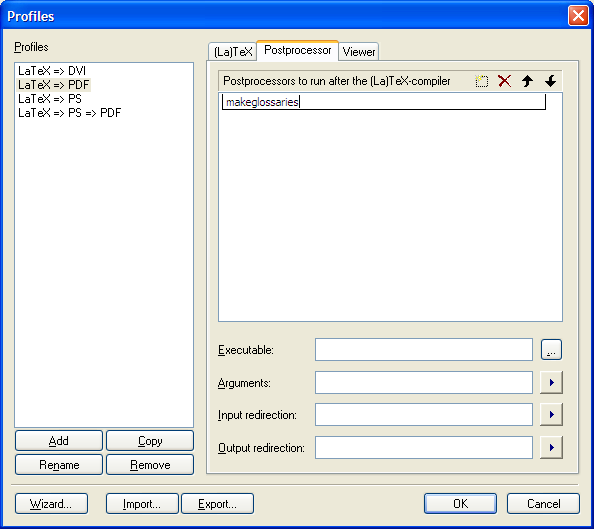
- Type in the full path name of makeglossaries.bat into the executable box or use the ellipsis button on the right to browse the filing system. (On my Windows partition, the file can be found in the folder C:\Program Files\MiKTeX 2.7\scripts\glossaries but it may be somewhere else on your system.)
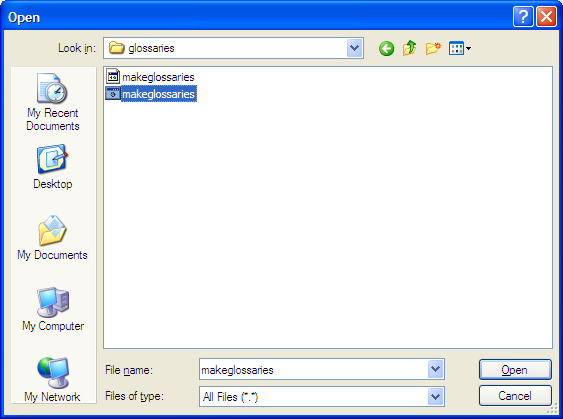
(The full path name must be surrounded by double quotes if it contains spaces.) - Type
"%bm"in theArgumentsbox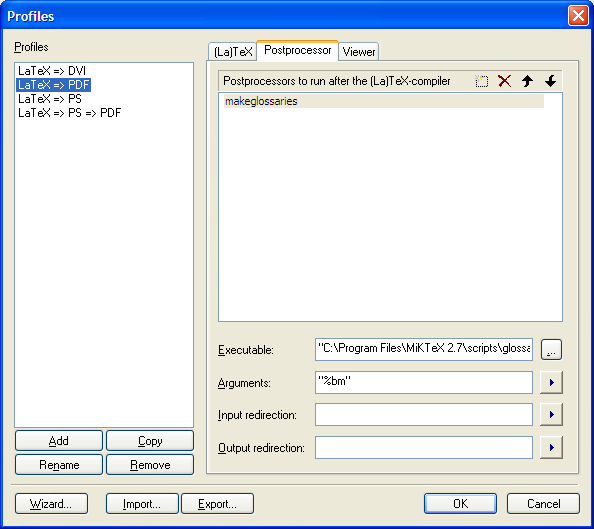
- Repeat for each output profile as desired.
- Click on okay
WinEdt
There is a thread on comp.text.tex that discusses how to use makeglossaries with WinEdt.